
Our local Audubon birding chapter received a grant to construct a native plant garden at nearby Hundred Acre Hollows. The grant had several requirements to fulfill, one of which was that it had to incorporate some kind of upcycled feature. We chose to make banners to use for the ribbon cutting ceremony and other photo ops.
We started with two large vinyl banners. If you do a Google search for "vinyl banners" you'll get an idea of what I mean. Businesses and organizations often use them on the front of a table at conventions, fairs, and other places where they advertise their services.
Of course, most of the time when the banners have become outdated, worn, or the company goes out of business, they end up in the landfill. Ick. And people just buy more. It's a vicious cycle.
One of our board members obtained two no-longer-needed banners that happened to be white on the back. That gave us a perfect canvas to work with!
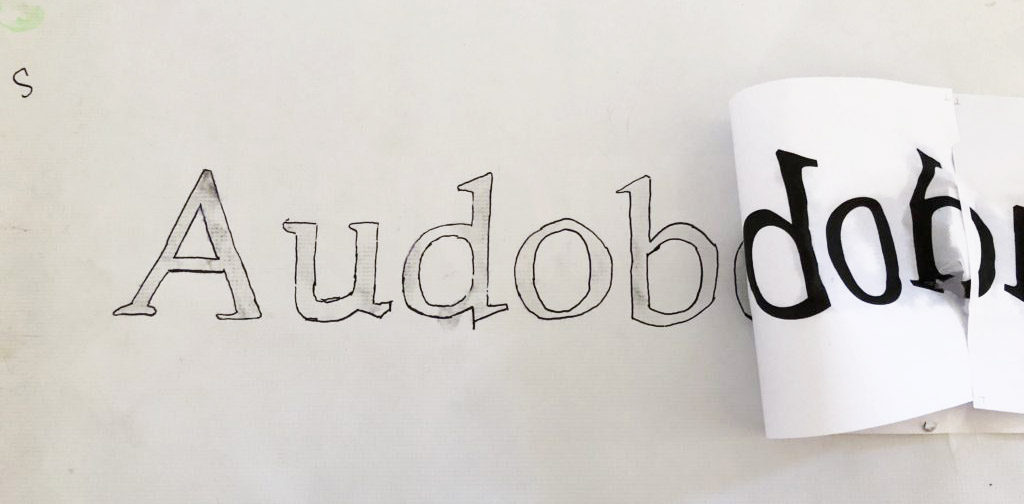
The process starts with Photoshop. I created an image in Photoshop that was 50" wide by 8" tall, and 300dpi. I found a font I liked and typed in the words I wanted to transfer as large as possible, which happened to be 350px. Once I was happy with it, I cropped off the whitespace around the words (to help avoid wasted paper when printing) and then reversed the image by using Edit > Transform > Flip Horizontal.
Then I saved the image to a PDF, and opened it in Acrobat.
From Acrobat, I was able to print it as a poster using the settings shown below. For Page Size & Handling, I chose Poster, made sure Cut marks was checked, and left the rest at their default.
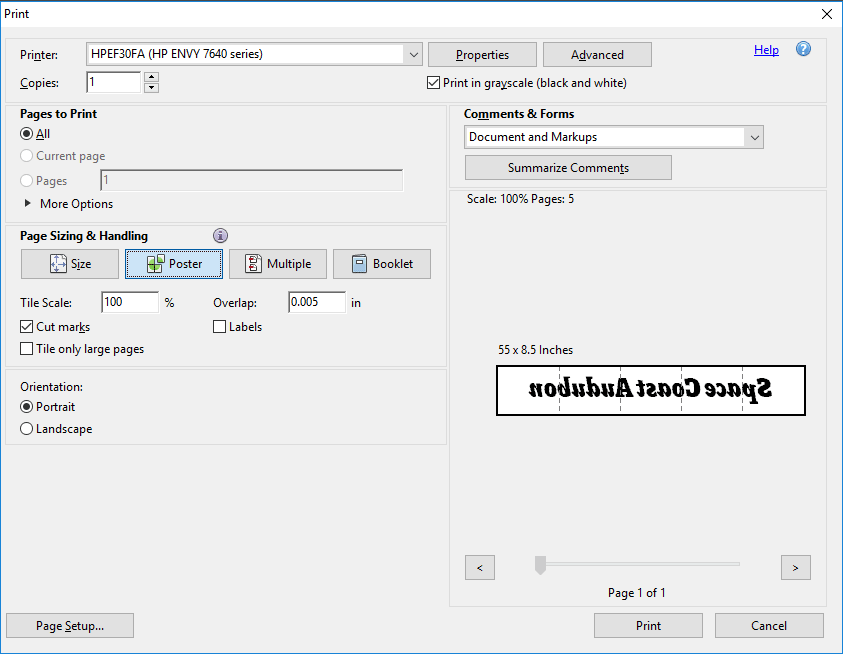
What this did was print out a bunch of pages with the letters at full size. Each page had cut marks at the corners, so I could easily cut off the extra whitespace with my paper trimmer. (There's extra whitespace because most printers won't print all the way to the edge of the paper.)
Then I just used Scotch tape to tape all the papers together, making sure the pages were lined up. I centered the combined papers on the banner, with the ink facing down, which made the letters face the correct way again. Finally, I used a wet paper and rubbed the back of the paper enough to transfer the letters to the vinyl. It didn't transfer much, but it was enough to see them so that I could then trace each one using a Sharpie permanent marker..
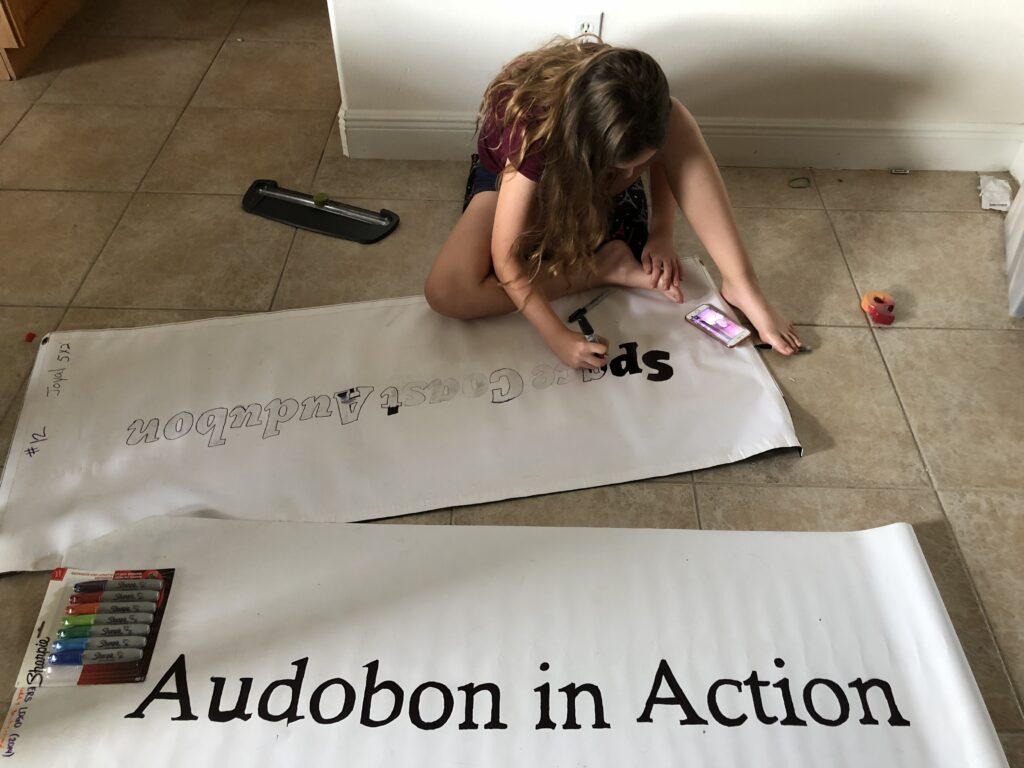
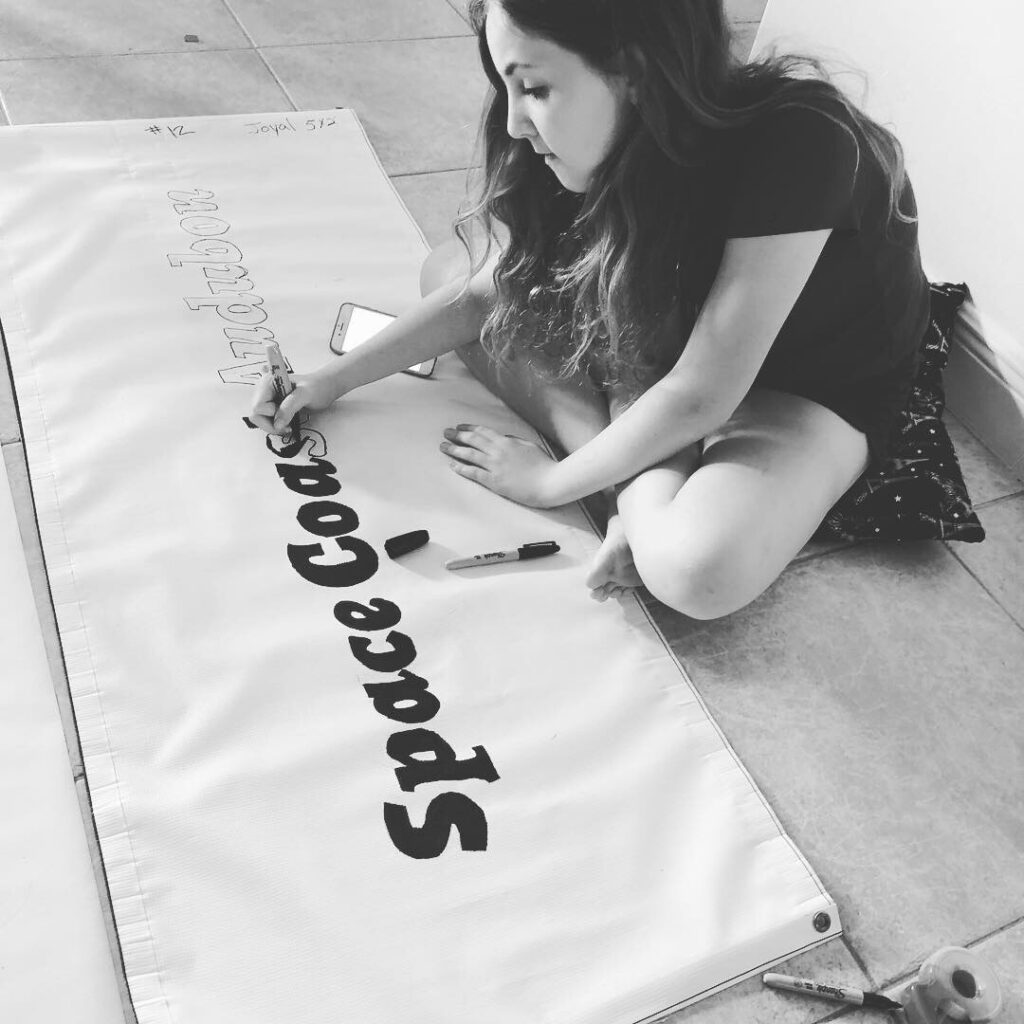
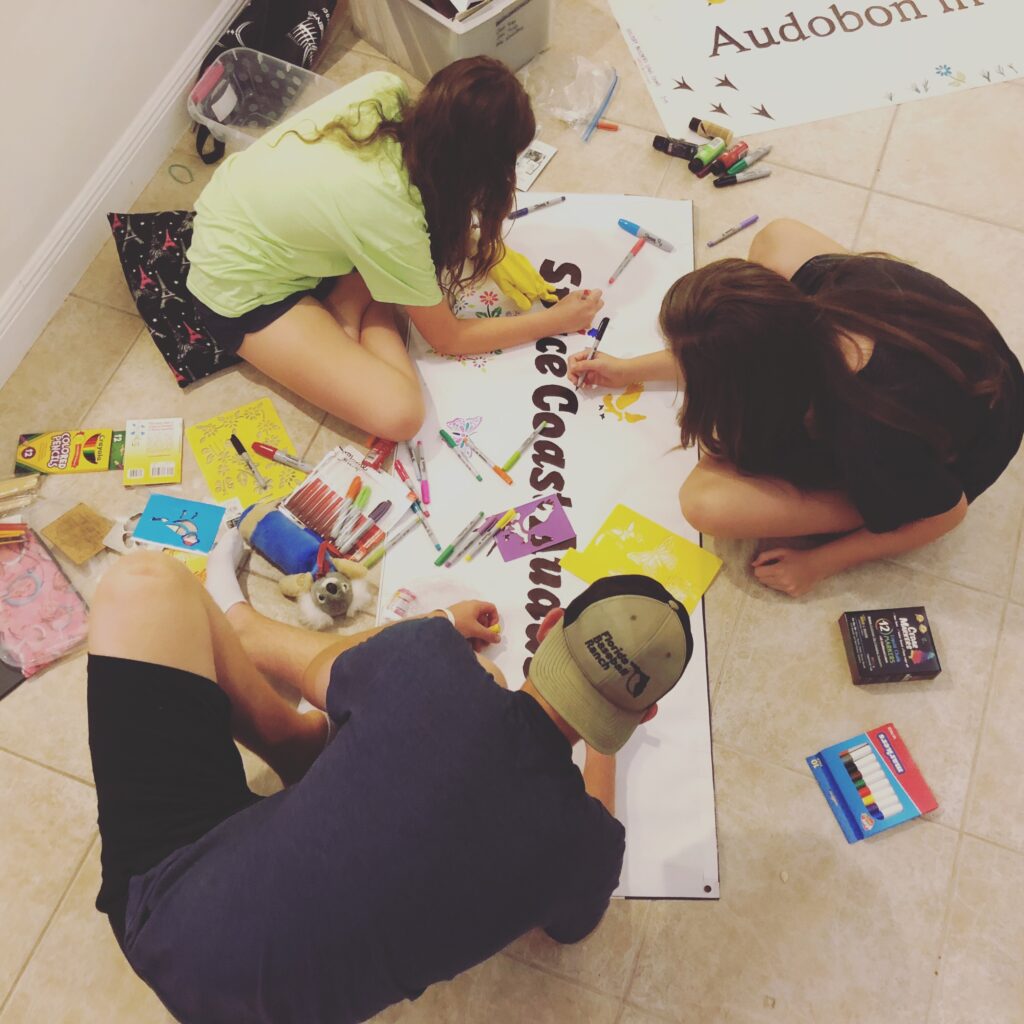
Once my daughter got home from school, she joined in the effort. She's 11 and managed to get herself assigned as social media coordinator for this whole grant-based native garden project. (She wanted to be on the Audubon board but settled for this.) She filled in the letters with the black Sharpie. You can see her hard at work in the images below.
And here's a shot of the banners once the lettering was complete. The words are large and dark and very easy to see even from a distance.

Then we all got creative with colored sharpies and stencils and paint. Another criteria of the grant was to reach out to underserved populations, and we felt that for our Audubon chapter, that included children. And kids love to be creative!
The signs were completely finished and ready to display for our planting event! We had a number of members show up to help put our beautiful native plants in the ground. A few of them posed for a photo at the end of our efforts.
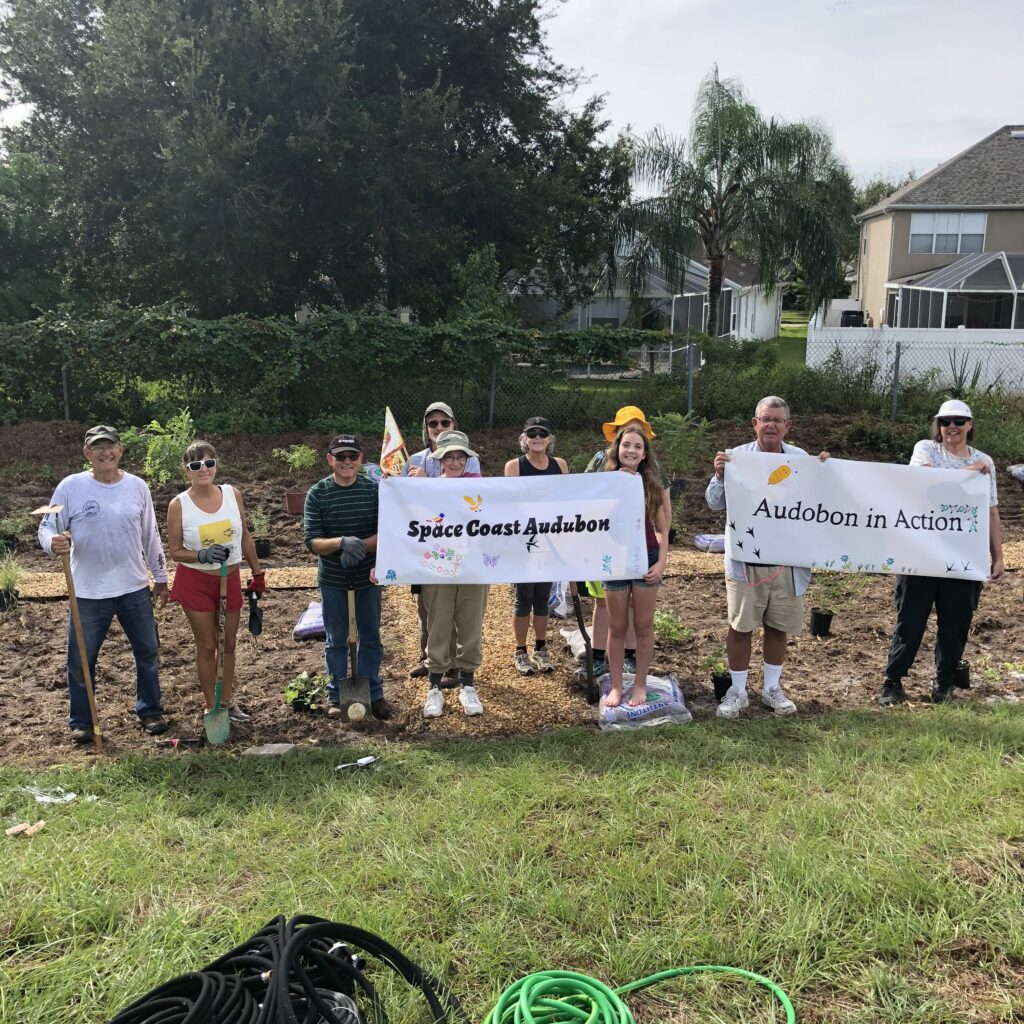
There you have it! We saved two large pieces of vinyl from the trash dump, involved some kids, planted some plants, and had a great time. The garden is an ongoing project. If you're in the local area, please stop by Hundred Acre Hollows in Suntree, FL to check out the beautiful garden! (It's in the southeast corner of the property.)
And if you need to make your own banners and have questions, feel free to ask.

kath
Kool...great family project!!
Susan
Definitely! There's not a whole lot we get to do together anymore...this was almost like when they were little!
Lin
Nice work! Thinking of doing a banner like this, but had a question or two: Did you paint out the back (printed) side? Did it show through in the sun? Thanks for sharing :)
Susan
Lin, thanks for your comment and question! We did not paint the back at all, but I can't remember what was on the back. I can tell in the picture that some sun is shining through it, but I know we didn't have an issue with anything printing showing through. I'm going to reach out to the person that provided them originally and see if she still has them so I can ask. I'll post back here if I can find out.
Susan
Lin, I even got some photos of the original sides! One was 1/3 navy background and 2/3 white background with navy print. The other banner on the flip side was a medium gray background with navy and white printing. If you scroll up to the photo of our group holding the sites in the garden, I don't think you can see anything shining through. It looks like some shadows are present, but not the printing.
I'm not sure if all of these have the same thickness. but in our case at least, I think it was ok!
Katie Squire
Hi! What paint was used and did it last? Great ideas
Susan Petracco
Katie, it was just the cheap acrylic paint in little bottles that you can get in most craft stores. The signs were for a ribbon cutting and we never used them after that, so I don't know if it would last or not. Someone else took them home, so I don't even have them where I could check for you. I'm sorry!
Kelsey C
I am curious too if the sharpie lasted in the weather. I am wondering what to use on our sign that will last. Thanks!