Learn how to easily build a DIY spice shelf to organize your jars of dried spices and make them pretty too! This solutions makes sure they're all visible, and if you keep them alphabetized, very easy to find.
I know we all have our pain points when it comes to kitchen organization. Maybe your refrigerator is a nightmare, or perhaps your pots and pans are always a jumbled mess.
They are for me :)
Both nothing was worse than the spice cabinet! I love to cook with herbs and spices, but I hated shuffling through tons of jars looking for the one or two I needed. I also didn't like how we wasted money on duplicates because we thought we were out of something we weren't.
What I Had Tried Before
A few years ago I cleared a shelf in a cabinet next to the stove, so I wouldn't have to go back and forth between the cooking area and the pantry, which is on the other side of the kitchen island. This, in and of itself, was genius...no really, or was it just stupid that they hadn't started out there?
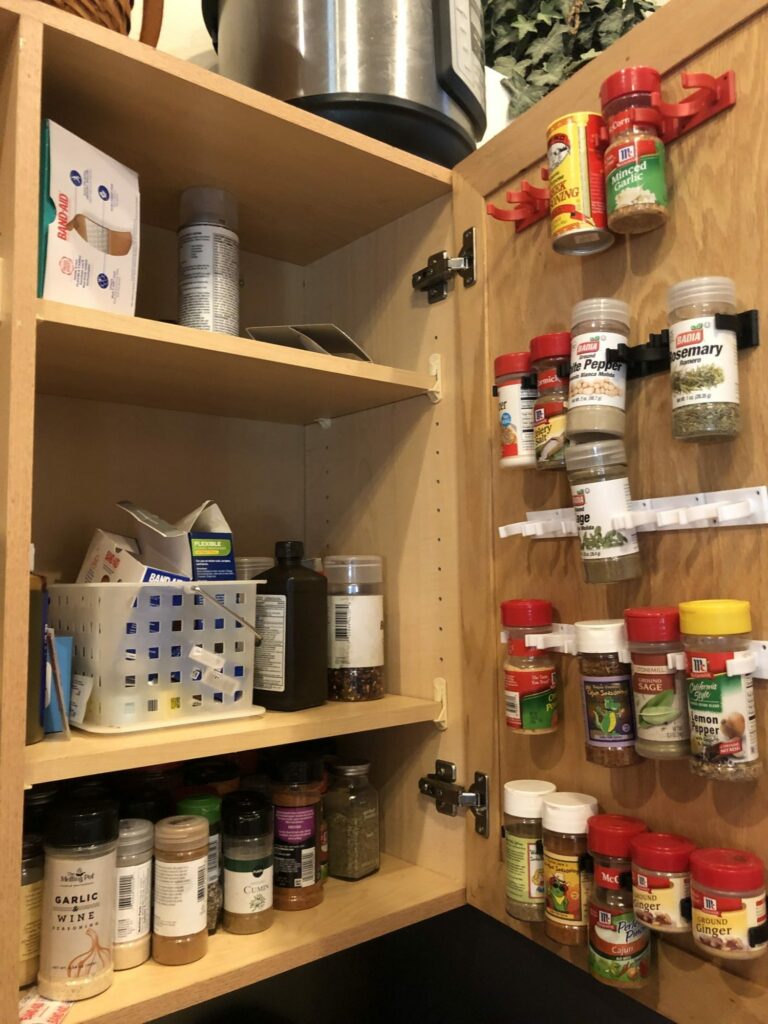
The problem with having the spices in the cabinet, even though they all fit well, was that it was incredibly hard to find what I needed when I was cooking. The ones in front buried the ones behind it. Also, rather than digging for a spice we needed for a new recipe, we would sometimes just buy more. (I literally have four jars of minced garlic right now.)
My next step was to buy some spice rack hangers to put on the back of the door. I thought it would be good to put the ones I used most there, where it was easier to see them. (For example...minced garlic.)
The problem with that...well there were lots of problems with that. First of all, if I didn't get the jars spaced exactly right, the door wouldn't close. Second, I only wanted to store plastic containers there, not glass ones, in case they fell. Finally, my husband HATED them. And since he does 50% (or more!) of the cooking, that one was really important.
Then I came across this post and OMG it was so pretty! Even more importantly, it was functional. So freaking functional that my brain freaked out. I had to have it myself.
It seemed like a fairly simple woodworking project. I followed her plans pretty closely. But I did make a few changes.
First, my cabinets don't have a lip, so I was able to build all of mine in the garage, and then just stick it into the cabinet. It made things easier, but I did have to take the cabinet door off to get it through the opening. That door hadn't left its hinges in over 15 years, and the cabinets are not the best (builder grade) so I was actually a bit worried. It turned out fine though.
Rather than plywood, I used a smooth-finished poplar board. I didn't want to have to paint these like the original post. The ones I got were much smaller, and I needed a total of three to make all of the shelves and risers.
I really love the wood I chose. But I'm still not super accurate with my miter saw, and each board is a little different length than the other ones. Now that its in the cabinet, you can't tell. But it bugged me. What I noticed after is that the original bloggers used a single sheet of plywood and cut it to the correct width before ripping individual boards. What an easier way to make sure they are all the same length! Live and learn.
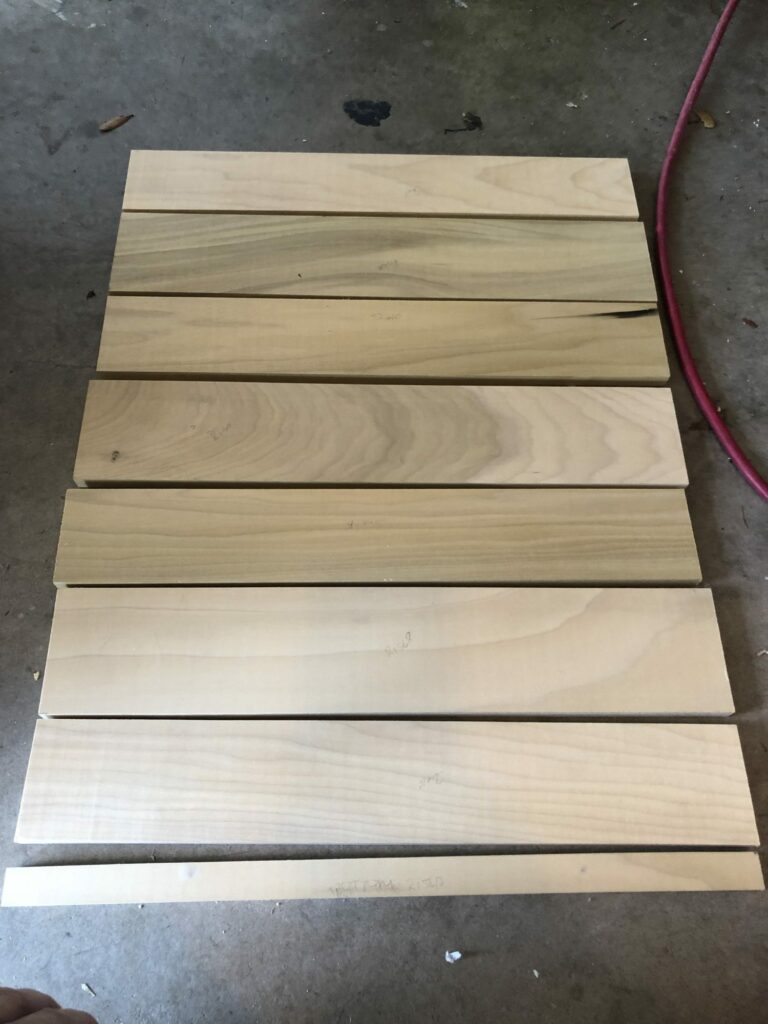
Finally, I didn't want to attach mine to the cabinet. I naively thought that perhaps it would stay up on its own. NOPE. So I added two pieces of 2x3 boards under the top shelf and it was just enough to stabilize the piece.
Here's the final product inside the cabinet.
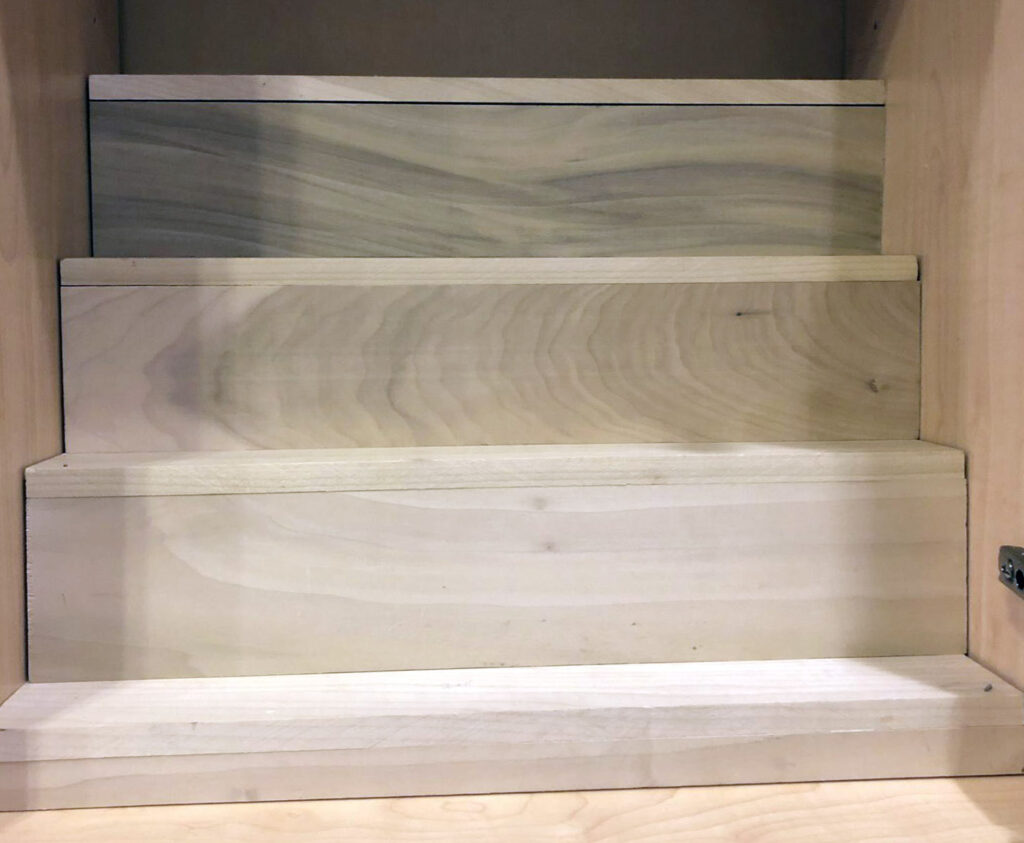
Finished spice shelves in the cabinet
And here's how it looks with the spices set up.

Part of me wants to get all matching spice jars and cute labels, and I may do that in the future. But my life theme right now is "make do", and I wanted to stick with that principle for now. I'm trying to be more frugal. Yay me. Power tools don't count.
Hubby calls the new spice rack our "spice amphitheater". I guess that's pretty accurate. If spice jars went to the movies, this would be their stadium seating!
How to Build This DIY Spice Shelf
As mentioned above, these plans are modified based on those at Joyful Derivatives. Click through for their original post.
Step 1: Measure the cabinet. Mine turned out to be 17" wide and 10.75" deep.
Step 2: Determine cut list. I decided to go with the same number of shelves and height of each one as the original post, but I had to modify them for the width. I also added in my back support posts. Here was my final list:
- (4) 17" x 2.75" shelves from poplar boards
- (3) 17" x 3.25" main risers from poplar boards
- (1) 17" x 0.75" bottom riser from poplar boards
- (1) 17" x 2" top support - I used remaining wood from the poplar boards, but cheap plywood would be fine too. This is hidden once installed
- (2) 11.5" long pieces of 2x3s for the back supports
Step 3: Cut Boards. I used a combination of my miter saw for cross-cuts and my table saw for ripping lengthwise.
Step 4: Assemble shelves. You can see how different boards went together to create the final shelving unit in the photo below. As suggested by the original post, I used clamps to hold the wood together while I nailed them using my brad nailer.
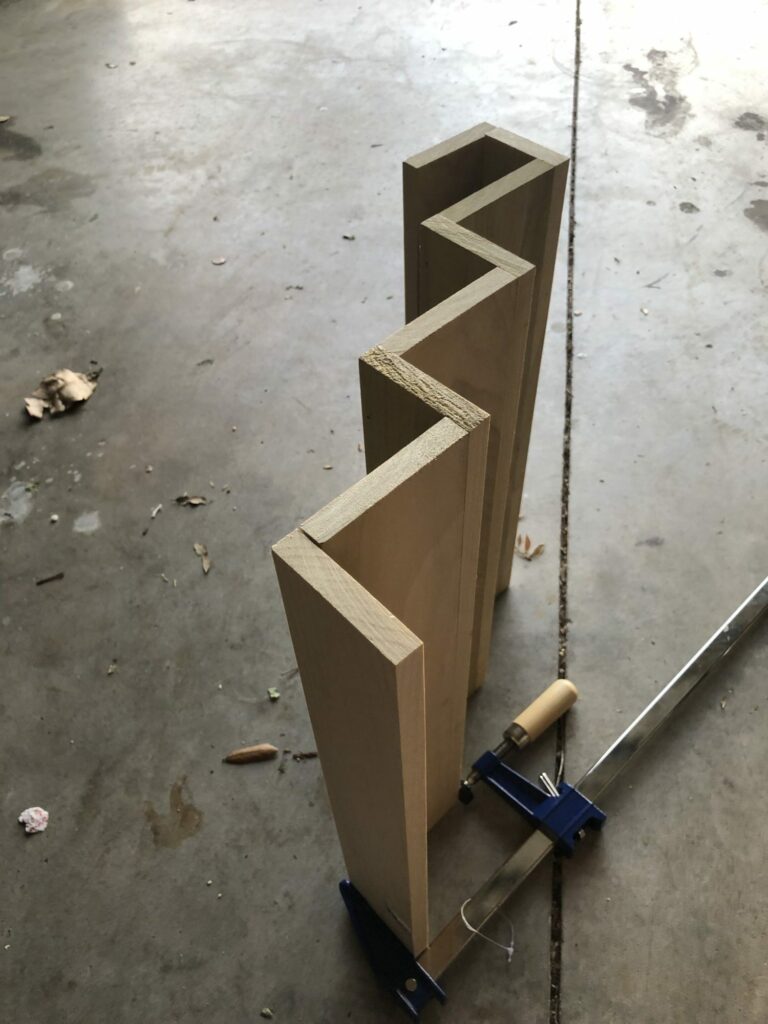
Step 5: Install in Cabinet. Because I had used finished poplar boards, I didn't spackle and paint after I'd assembled the shelf. To install, all I did was remove the door (the shelves wouldn't go in otherwise) and then set the spice shelves inside the cabinet. The 2x3 supports in the back keep it vertical and in place without the need to attach the shelves to the cabinet box. That way it's easy to remove later if I change my mind and/or we sell our home. Then I put the door back on.
Update!
I finally got mostly-matching spice jars and the space looks so uniform that I had to post and updated photo.
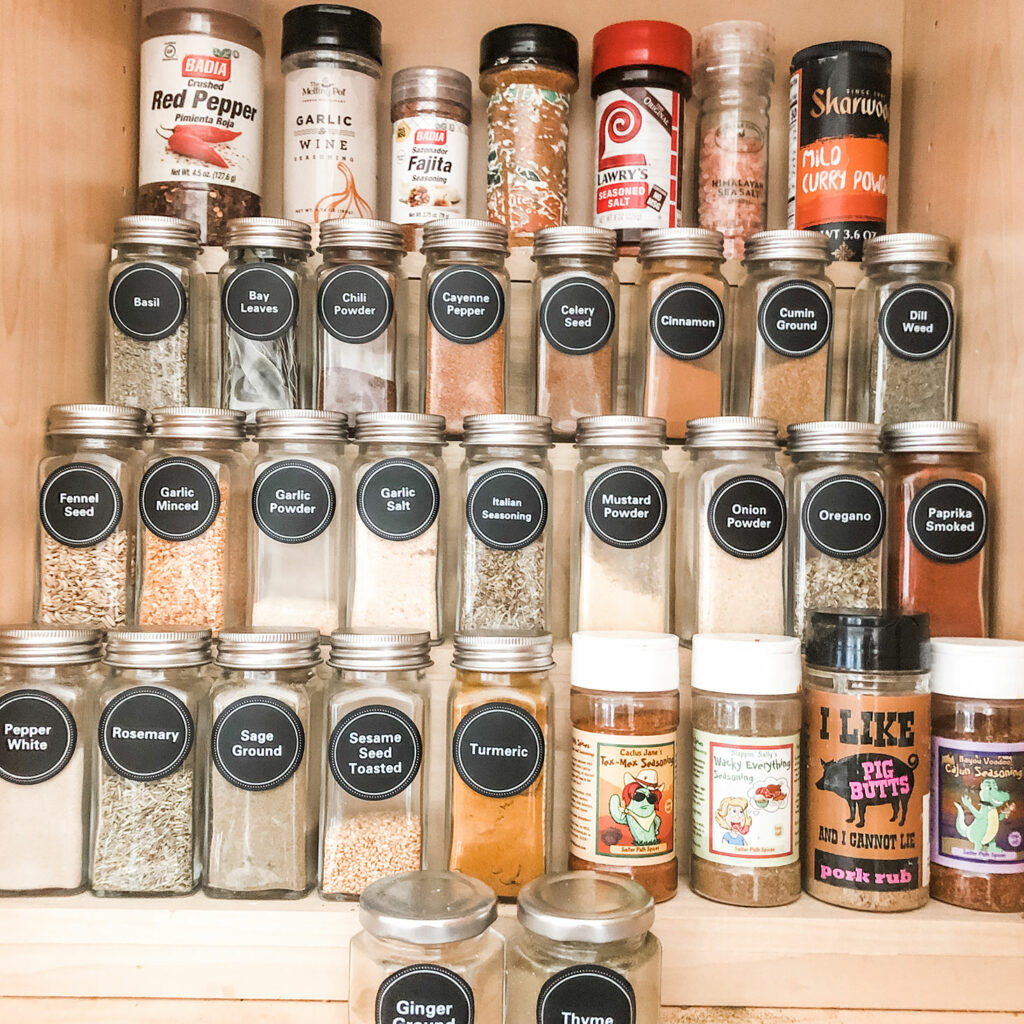
What do you think? Do you have a better system for organizing your spices? If so, leave us a comment below. I'd love to see what others have come up with! And of course, if you have any questions about my build process just let me know.

Kathleen Petracco
kool idea!!!
Susan
Thank you Kathleen! We're really enjoying the convenience.