
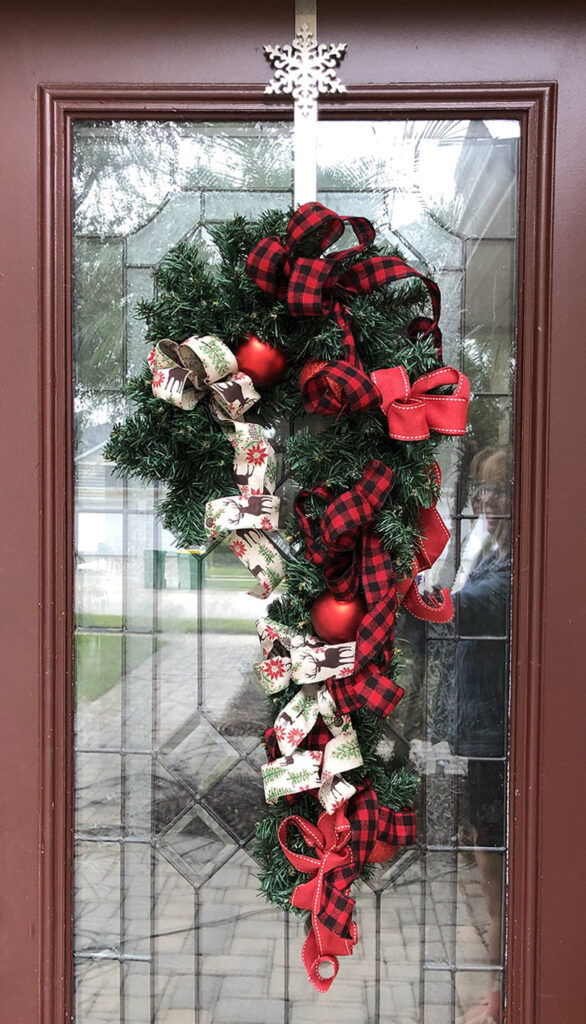
Wreaths are a beautiful way to showcase your holiday spirit right as people enter your home. Many of us hang beautiful wreathes on our front doors, but perhaps you are looking for something a bit different? Create some surprise with a unique shape by making this candy cane wreath. It's perfect for your Christmas décor!
This year, I'm obsessed with red and black buffalo check. I'm pairing it with silver inside the house, but I found a combo of wired ribbon from Joann Fabric that I really liked outside that includes a tan instead.
I actually made this wreath years ago, but I was growing tired of the colors, and the ornaments had started to fade. So not only is this fun and easy to make, you can easily change it up in a few years by swapping in new ribbon and different ornaments.
Jump to:
Supplies and Materials
If you want to follow along, here's a list of what you'll need:
- a plain fake-fir candy cane-shaped wreath, mine was from Hobby Lobby.
- 2" wide wired ribbon in two or three coordinating patterns
- green floral wire
- ornaments for filler
- scissors
How to Choose the Ribbon
Finding several styles of ribbon that work well together can be challenging. I suggest picking your favorite one to start with. For me, it was a red and black buffalo check. That was my Christmas decorating theme for the year, so it was easy to start there.
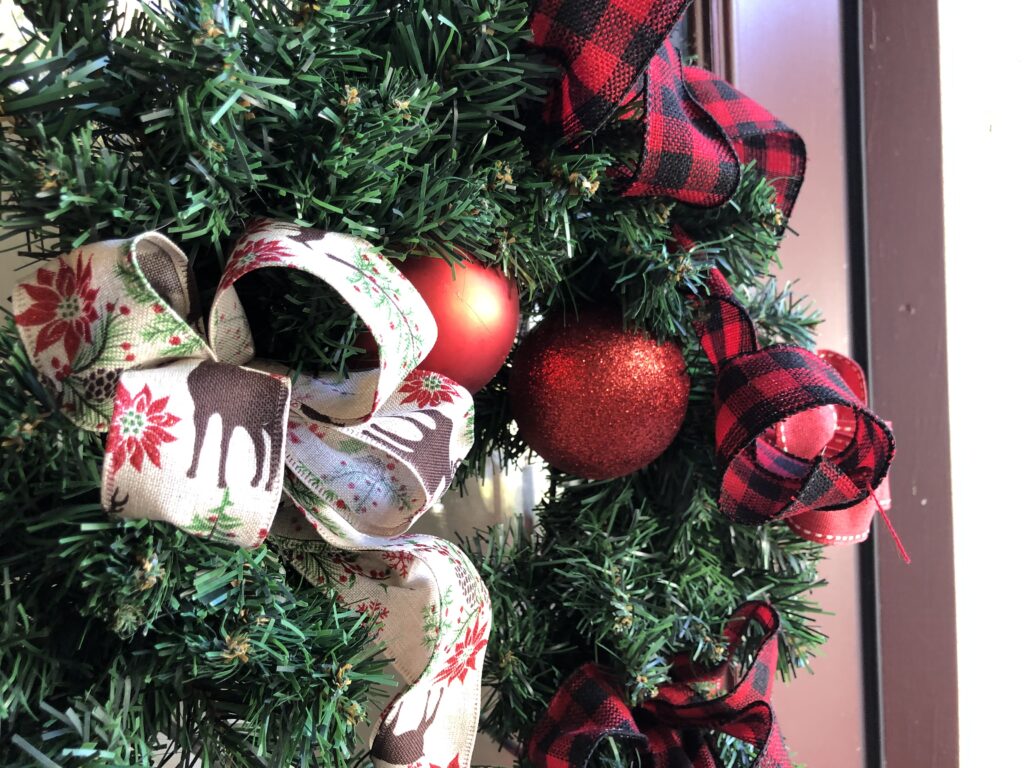
Next, look for additional ribbon that has at least one of the same colors as your first one. I choose a solid red with a tan border in a stitched design. From there, I chose my final ribbon, which had the same tan as the background, but with a busier print that included reindeer, Christmas trees, and poinsettia flowers.
It's important that all three ribbons aren't too busy. As you can see from my choices, one is busy, one is almost entirely a solid color, and one is patterned but less busy, as it only has two colors.
Sticking with a color palette helps, too. For me, it was red, black, green, and tan. Some other popular Christmas color combinations are:
- Red, green, and gold
- Red, lime green, and silver
- Ice blue, royal blue, and silver
- White, silver, purple, and bright pink
- Blush pink, gold, and white
How to Make Ribbon Bows
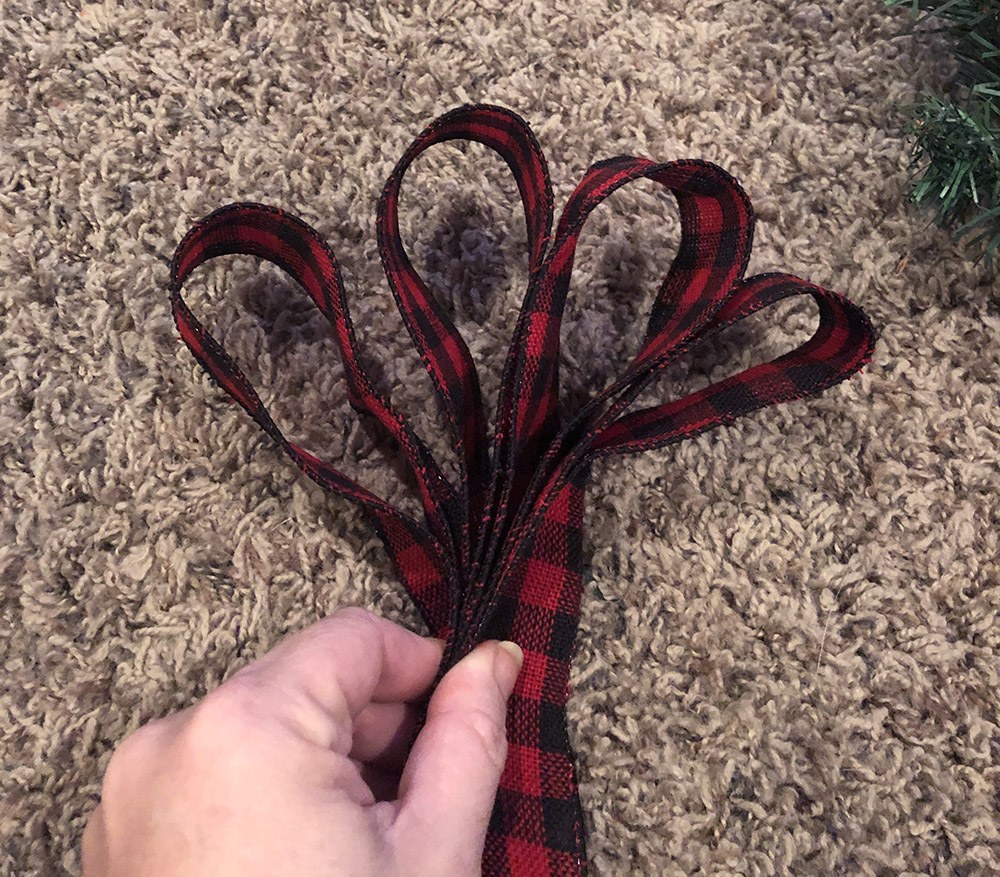
The bows are easy to make. First, cut lengths of ribbon that about 3 arm-lengths each. From the center, make four loops, leaving longer tails on each end. Grip them as shown above. Then wrap green floral wire around the base, right where I'm holding the loops together in the photo above.

You can see the wire in the photo above. It's a fairly long piece of wire because you will use the same wire to wrap the bow around the wreath to hold it in place.
Assembling the Wreath
I made seven bows in all, figured out where I wanted to place them, then twisted the floral wire tails of each bow in place around the "greenery" of the candy cane. Depending on the size of your wreath and your bows, you may want more bows or fewer...it's up to you.
Finally, you can use additional pieces of the same floral wire to attach simple ball-shaped ornaments throughout. They add a bit of sparkle and can help fill in any blank spots. You can also be more creative with the ornaments, especially if your ribbon is less busy. Think about whether you want the ribbon or the ornaments to have top focus!

Hanging the Wreath
Use any wreath hanger to hang your new creation on your door. It can be simple or decorative, whichever you like. Mine is silver and has a snowflake, and you can find it here on Amazon (affiliate link). The candy cane wreath will hang from the bend at the top of the "hook" part of the shape.
Once hung, you can shape the loops to remove any bends. Make a spiral of the tails by wrapping them around three fingers. Since the ribbon is wired, it holds its shape pretty well, even in the elements, and you can reshape it each year when you hang it. Even if it gets smooshed in storage!
What do you think? The new colors and patterns definitely match my current style better, and I love the way the updated wreath looks on our front door!

Martha says
Love it. Can’t wait to see it in person.
Susan says
Thanks Mom! Not much longer now!